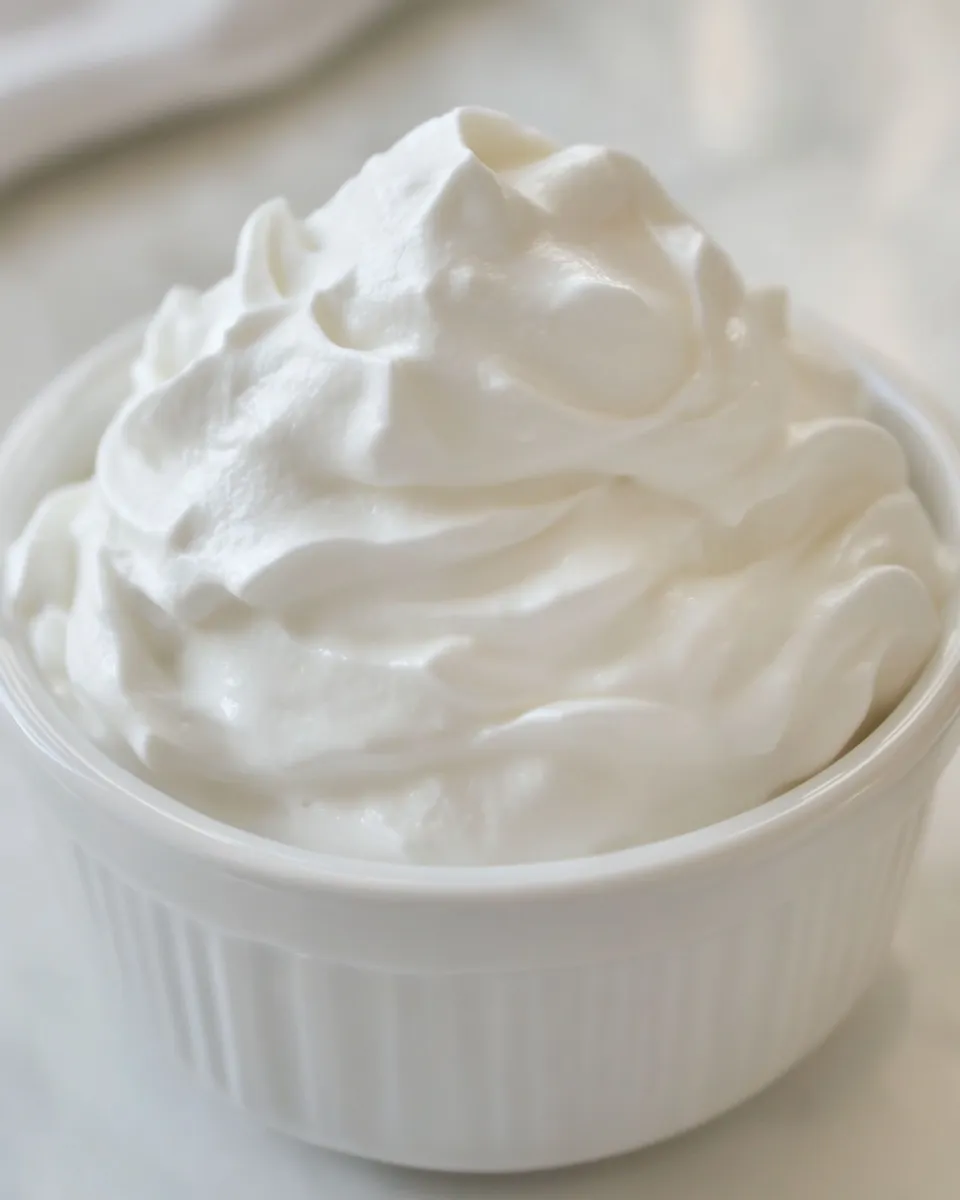
Quick note: this whipped cream is one of those tiny kitchen miracles. With just three ingredients and a cold bowl, you get airy, stable peaks that dress up berries, coffee, keto pies, or just a spoon straight from the bowl. I make a batch whenever I want a low-carb finish that doesn’t taste like a compromise.
I like to think of this as a technique recipe more than a long ingredient list. The steps are simple and forgiving when you understand what each ingredient does. Cold cream, a powdered sweetener that won’t spike your carbs, and a splash of vanilla are all you need for classic, neutral-sweet whipped cream.
Below you’ll find the exact ingredient lineup, the step-by-step guide I use in the test kitchen, the common mistakes that turn this into butter, storage advice that keeps it fresh, plus practical swaps and appliance notes. If you want a rock-solid, everyday keto whipped cream, this is the one I reach for time and again.
The Ingredient Lineup
Ingredients
- 2 cups heavy cream, cold — the only structural ingredient; cold cream whips faster and builds stable air pockets.
- 1/4 cup sugar free powdered sugar — provides sweetness and body without carbs; powdered form helps dissolve quickly and stabilize the foam.
- 1 teaspoon vanilla extract — flavor enhancer; a small amount brightens the cream without making it sweet-heavy.
Keto whipped cream Cooking Guide
- Place your mixing bowl and whisk/beaters in the freezer for at least 15 minutes to chill.
- Remove the chilled bowl. Pour in 2 cups cold heavy cream, 1/4 cup sugar free powdered sugar, and 1 teaspoon vanilla extract.
- Using a stand mixer with the whisk attachment or a stick blender, beat on medium speed. Stop once the mixture starts to thicken, scrape down the sides, and continue beating.
- Beat until medium peaks form — when you lift the whisk or blender, the cream should hold its shape but the tip of the peak will curl slightly. Do not overbeat (it will become grainy or turn to butter).
- Use the whipped cream immediately, or transfer to an airtight container, cover completely, and refrigerate for up to 24 hours.
Why This Recipe Is Reliable

There are three reasons this recipe works every time: temperature control, powdered sweetener, and a clear visual cue for doneness.
Cold equipment and cold heavy cream are non-negotiable. Fat traps air more efficiently when it’s cold, so chilling the bowl and beaters shortens whisking time and reduces the risk of overbeating. The modest chilling step is the single easiest win in getting consistently light, glossy whipped cream.
Using a powdered sugar alternative is also practical. Powdered texture dissolves faster than granulated sweeteners and helps stabilize the foam without adding graininess. The vanilla is just enough to balance the flavor without competing with whatever you serve it over.
Finally, the “medium peaks” cue is our safety valve. It’s a tactile and visual moment you can coach yourself to watch for: the cream should form a peak that holds but with a gentle curl at the tip. Stop there. If you keep going, it will go past stiff peaks into a grainy texture and eventually separate into butter and buttermilk.
Substitutions by Category
Want to tweak this? Keep swaps general and practical so you don’t upset structure.
Cream: Any heavy cream with a similar fat content works. Ultra-high-fat creams whip fastest; ultra-low-fat products won’t hold peaks. If you must use a different cream, chill it thoroughly before whipping.
Sweetener: The recipe calls for sugar free powdered sugar. If you don’t have a powdered keto option, use a finely ground sweetener made for baking, or pulse a granulated sugar-free sweetener into a fine powder before mixing. Powdered form matters for texture.
Flavor: Vanilla extract is the baseline. You can skip it or use a different extract or a tiny amount of zest to change the flavor profile. Keep the amount small so it doesn’t destabilize the cream.
Appliances & Accessories
Essentials
Stand mixer with a whisk attachment or a stick blender with a whisk attachment are the easiest ways to get consistent results. Hand whisks work, but expect a workout and longer whisking times.
Helpful extras
A medium metal or glass mixing bowl chills faster and retains cold better than plastic. Clean, dry beaters are important — any residual oil or water can interfere with foaming. An airtight container with a tight lid is needed for the 24-hour fridge storage.
Mistakes That Ruin Keto whipped cream
- Using warm cream or an unchilled bowl — the cream won’t trap air well and will take longer to thicken, increasing the risk of overbeating.
- Switching to granulated, unpowdered sweeteners without converting them to a powder — this can leave the cream grainy and under-stabilized.
- Overbeating past medium peaks — this is the classic route to grainy texture or butter. Watch for the soft curl and stop immediately.
- Letting the mixture sit uncovered in the fridge — it can pick up odors or form a thin watery layer on top. Cover it completely if you’re storing.
Seasonal Spins
This whipped cream is a blank canvas. In winter I’ll add a whisper of warm spices to pair with pumpkin or chocolate desserts. For summer berries, I keep it plain or add a touch of citrus zest to brighten the berries’ sweetness — the vanilla extract already plays nicely with fruit.
Because the base is neutral and lightly sweetened, it doesn’t overpower delicate flavors. Use it over hot coffee in autumn, dolloped on chilled soups like gazpacho in the heat, or piled high on keto-friendly pies during the holidays.
Behind-the-Scenes Notes
In my kitchen, I test this on multiple days with different equipment to reduce surprises for readers. The biggest variable is often the temperature of the cream straight from the fridge. If it’s been sitting out, pop it back in to re-chill for 10–15 minutes. I also test with both a stand mixer and a handheld stick blender so I can recommend technique for both kinds of cooks.
When I say “medium peaks,” I’m encouraging cooks to use a visual check rather than a strict timing. Mixers and batters vary, so timing is only a rough guide. Scraping the bowl once during whipping prevents uneven texture — that’s included in the method for a reason.
Best Ways to Store
Follow the recipe’s finish: transfer the finished whipped cream to an airtight container, cover completely, and refrigerate. It keeps up to 24 hours under refrigeration. Beyond that, the structure starts to break down and texture suffers.
If you need it for later in the day, give it a gentle whisk by hand to revive the peaks before serving. Do not refreeze; freezing alters the cream’s structure and produces a grainy texture once thawed.
Reader Q&A
Q: Can I make this ahead for a party?
A: Yes — make it the same day and refrigerate in a fully sealed container for up to 24 hours. If you need it much earlier, plan to make it on the morning of or just before guests arrive.
Q: My whipped cream got grainy. Can I save it?
A: If it’s just slightly grainy, a short gentle whisk can smooth it. If it’s progressed toward butter, it’s best to stop and start again — graininess from overbeating means fat and liquid are separating.
Q: Will this work with plant-based creams?
A: This recipe is formulated for heavy cream. Plant-based alternatives behave differently and often require stabilizers or specialized processing to hold peaks; results will vary.
Q: Can I stiffen the whipped cream more for piping?
A: The method targets medium peaks for versatility. If you need stiffer peaks for piping, work very carefully and stop at stiff peaks — but be aware that stiffer peaks are closer to overbeating and can turn grainy quickly.
The Last Word
This Keto whipped cream is a reliable, no-fuss finish that elevates low-carb desserts and simple snacks alike. It’s fast, forgiving when you follow the temperature and peak cues, and it tastes like classic whipped cream without the carbs. Keep your bowl and beaters chilled, watch for that medium-peak curl, and you’ll have silky, airy cream in minutes.
If you try it, tell me how you used it — on coffee, berries, or a holiday pie — I love hearing which pairings become your go-to. Happy whipping!

Keto whipped cream
Ingredients
Ingredients
- 2 cupsheavy creamcold
- 1/4 cupsugar free powdered sugar
- 1 teaspoonvanilla extract
Instructions
Instructions
- Place your mixing bowl and whisk/beaters in the freezer for at least 15 minutes to chill.
- Remove the chilled bowl. Pour in 2 cups cold heavy cream, 1/4 cup sugar free powdered sugar, and 1 teaspoon vanilla extract.
- Using a stand mixer with the whisk attachment or a stick blender, beat on medium speed. Stop once the mixture starts to thicken, scrape down the sides, and continue beating.
- Beat until medium peaks form — when you lift the whisk or blender, the cream should hold its shape but the tip of the peak will curl slightly. Do not overbeat (it will become grainy or turn to butter).
- Use the whipped cream immediately, or transfer to an airtight container, cover completely, and refrigerate for up to 24 hours.
Equipment
- Mixing Bowl
- whisk or beaters
- stand mixer with whisk attachment
- stick blender
- freezer
- Airtight Container
Notes
TO STORE
: Whipped cream can be stored for up to 24 hours, covered, in the refrigerator. Any longer, as it will lose its stability and require to be re-beaten.
TO FREEZE
: As this isn’t a keto cool whip (that remains fluffy in a frozen state), it’s best not to freeze it. Making the whipped cream literally takes under a minute, so no prep needs to be made before making it.