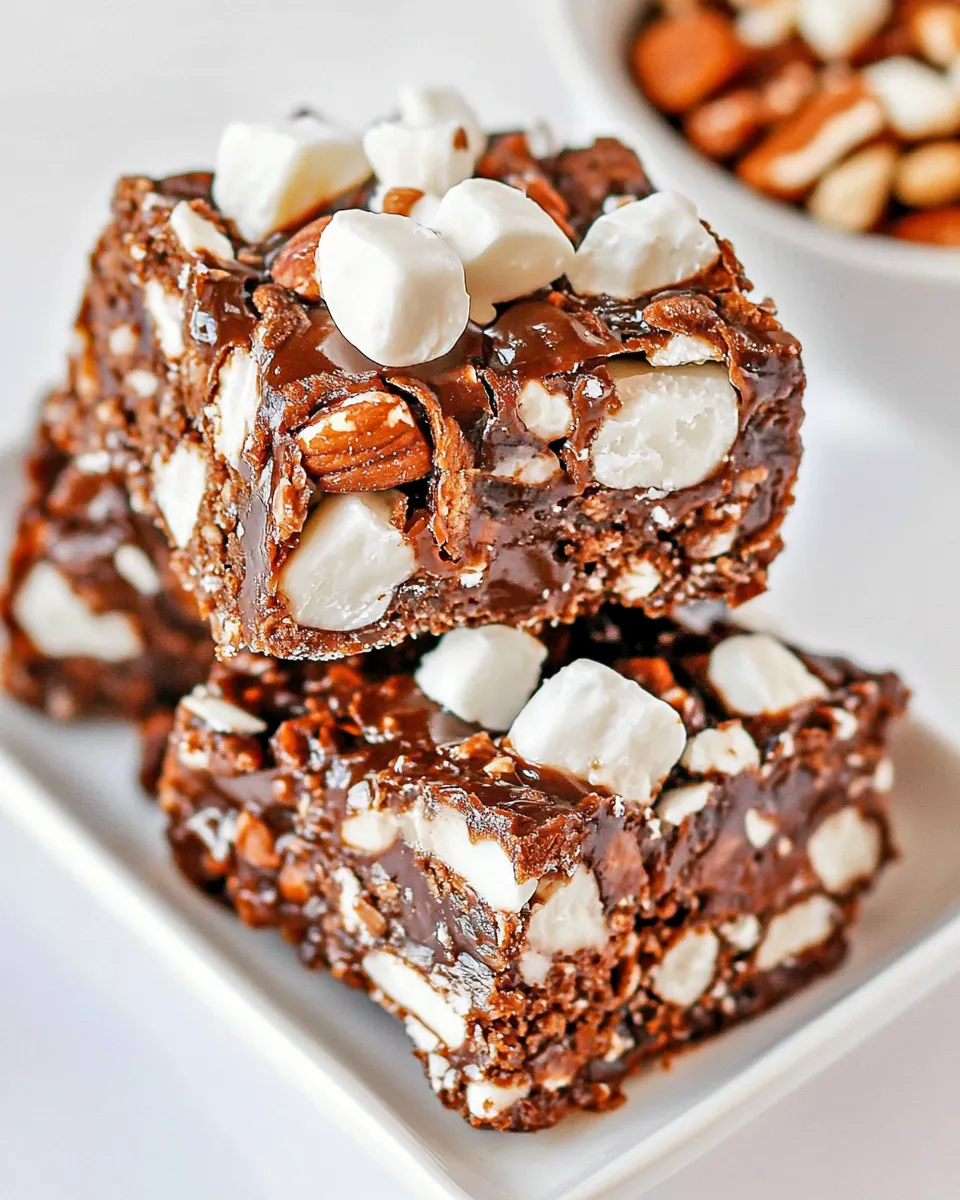
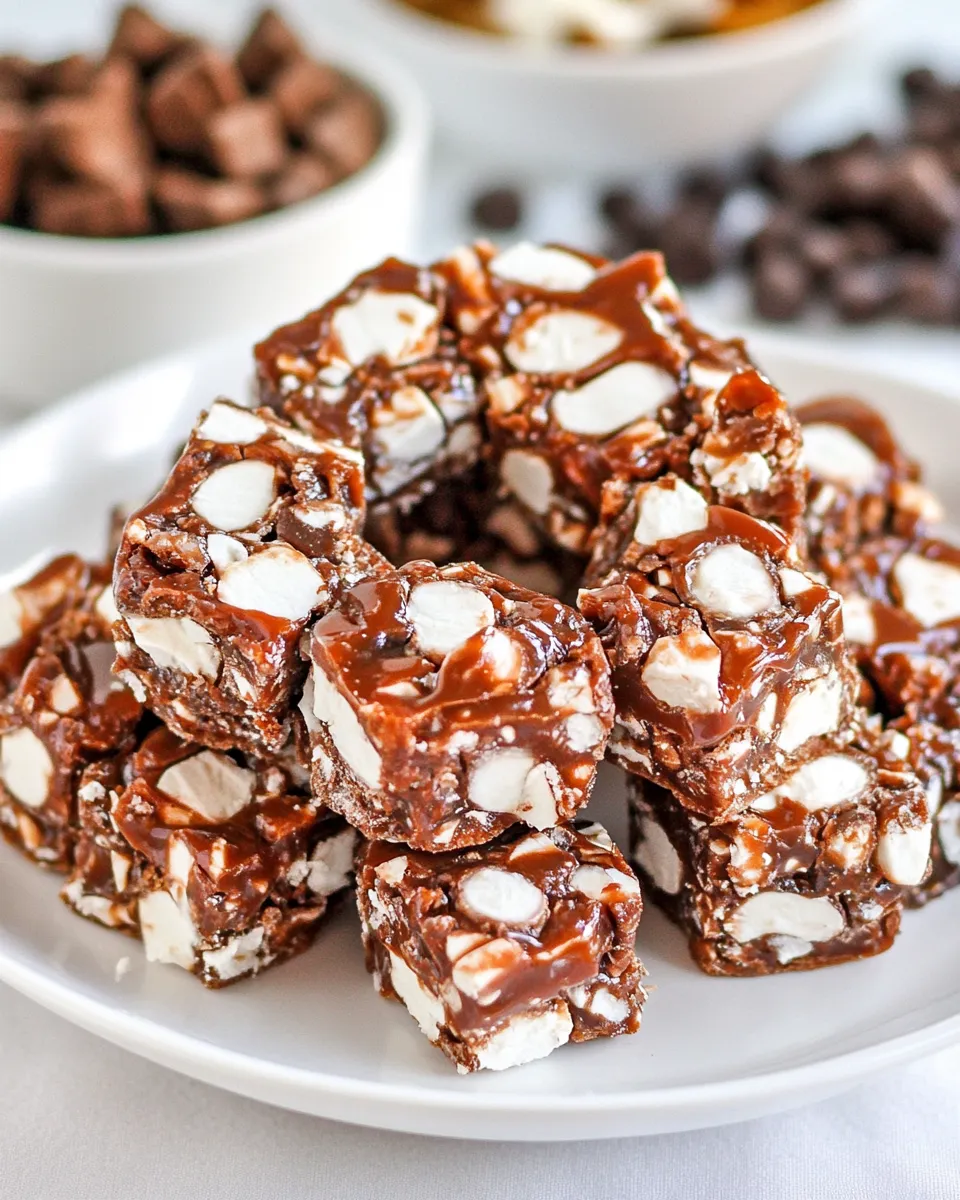
This Rocky Road Candy is the kind of simple, satisfying treat I reach for when I want something nostalgic and reliably delicious. It’s chocolatey, slightly chewy from the marshmallows, and has a satisfying crunch from the nuts. No tempering, no complicated steps—just a few solid ingredients and a little patience while it chills.
I like this recipe because it scales well and responds nicely to small upgrades: better chocolate, toasted nuts, or a pinch of flaky salt makes a big difference. It’s also forgiving. The marshmallows don’t need to melt into oblivion; they just get coated, which keeps the texture interesting.
Below you’ll find a clear ingredients list, exact step-by-step directions, troubleshooting tips, equipment notes, and useful variations. Whether you’re gifting it, packing it for a picnic, or keeping it on the counter for a sweet-stash, this is a great one to have in your repertoire.
What You’ll Gather
Ingredients
- 12ouncessemi-sweet chocolate chips — the base of your candy; choose good quality for better flavor and smoother melt.
- 4cupsmarshmallows(miniatures) — provide chew and classic Rocky Road texture; mini size mixes through the chocolate more evenly.
- 1/3cupschopped nuts — add a crunchy counterpoint; toasted nuts give a deeper flavor.
Directions: Rocky Road Candy
- Line a baking sheet or countertop with a sheet of waxed paper.
- Put 12 ounces semi-sweet chocolate chips in a heatproof bowl. Melt the chocolate either: (a) in a double boiler over simmering (not boiling) water, stirring until smooth, or (b) in the microwave at 50% power in 20–30 second intervals, stirring between intervals, until smooth.
- Let the melted chocolate sit 1–2 minutes so it is warm but not hot (this helps prevent the marshmallows from melting).
- Add 4 cups miniature marshmallows and 1/3 cup chopped nuts to the melted chocolate. Fold gently with a spatula until the marshmallows and nuts are evenly coated.
- Spoon the mixture onto the prepared waxed paper. Use the paper and a spatula or your hands to shape the mixture into a log.
- Wrap the log completely in the waxed paper (twist the ends or cover snugly) and place it in the refrigerator. Chill until firm, about 2 hours.
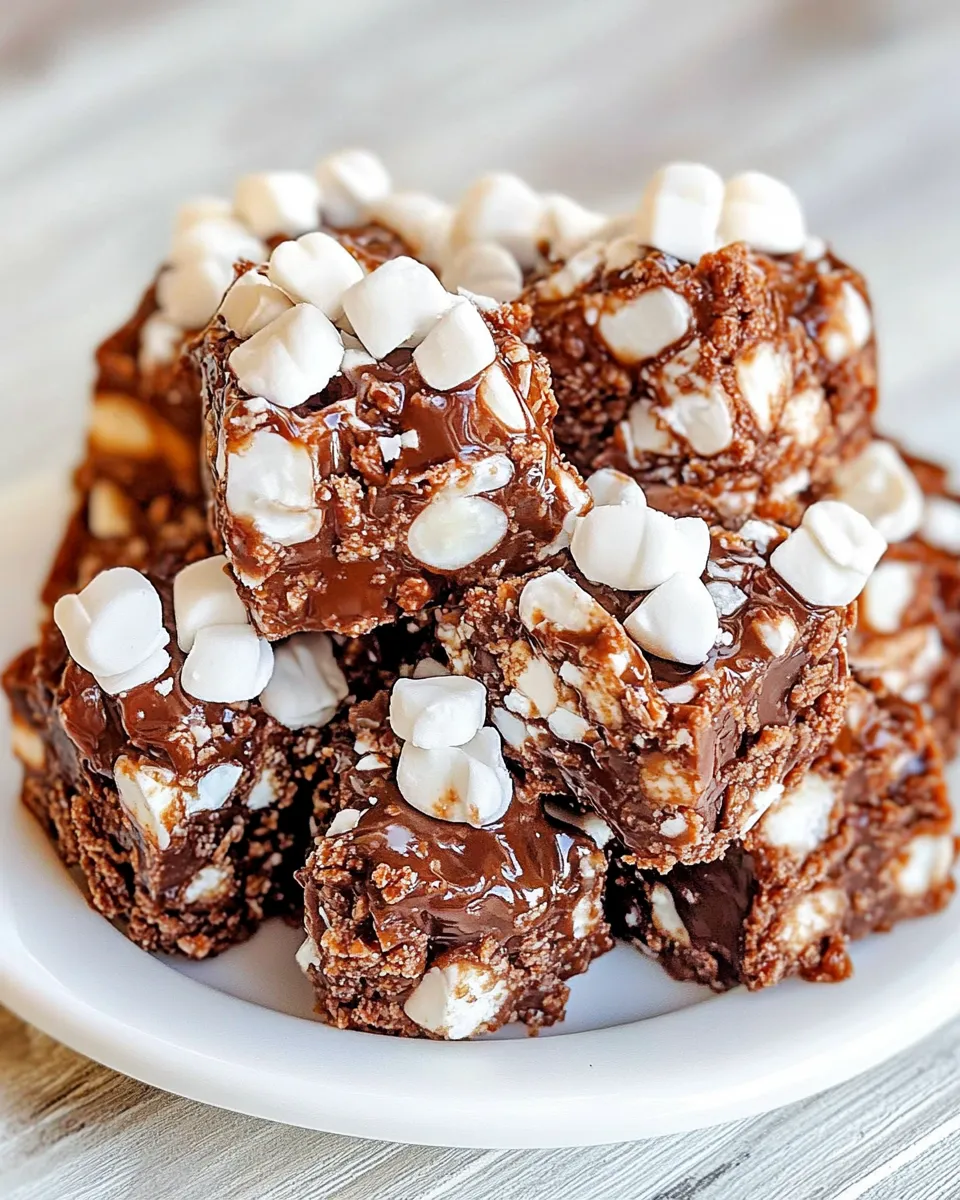
- Unwrap the chilled log and place it on a cutting board. Slice into 1/2-inch pieces with a sharp knife (wipe the knife between cuts if the chocolate sticks).
Why This Recipe is a Keeper
This Rocky Road Candy hits the sweet spot between simplicity and memorable flavor. You don’t need specialized skills or tools. The technique relies on basic chocolate melting and gentle folding so the marshmallows stay intact. In practice that means you get clear contrasts in texture and flavor: glossy chocolate, soft marshmallows, and crunchy nuts.
It’s also highly adaptable. Swap nut varieties, add spices, or use darker chocolate for deeper cocoa notes. Because the marshmallows are coated rather than melted into the chocolate, the final pieces keep their shape and a pleasant chewiness rather than becoming uniformly fudgy.
Finally, it stores well and travels well. Once chilled and sliced, these pieces are sturdy enough to box up for gifts or pack into lunchboxes without falling apart.
Low-Carb/Keto Alternatives

If you want a lower-carb version, the main targets are the chocolate and the marshmallows. Here are practical substitutions and notes to keep the texture balanced:
- Use sugar-free or keto-friendly chocolate chips made with erythritol or monk fruit. Look for brands that melt smoothly; some sugar-free chocolates can be grainy, so test melt a small amount first.
- Skip the marshmallows entirely or replace with a low-carb marshmallow alternative if you can find one without added sugars. Note that marshmallows contribute chew and volume; omitting them will change the bite of the candy and make it denser.
- Keep the nuts—most nuts are low in carbs. Macadamias, pecans, or almonds work well and provide healthy fats and bulk.
Be aware that texture and sweetness will differ. Taste and adjust by adding a pinch of fine salt or a drop of vanilla extract to the melted chocolate to round the flavors.
Tools & Equipment Needed
You really only need a few basic items. No special candy thermometer or complicated setup required.
- Heatproof bowl — for melting the chocolate.
- Small saucepan (for double boiler) or microwave-safe bowl — depending on your melting method.
- Spatula — to fold the marshmallows and nuts without crushing them.
- Waxed paper — lines the surface and wraps the log for chilling.
- Sharp knife and cutting board — slice the chilled log cleanly; wiping the blade between cuts helps.
Avoid These Mistakes
There are a few common pitfalls, and they’re easy to avoid.
- Overheating the chocolate — keep the water at a simmer if using a double boiler; if using a microwave, use 50% power in short bursts. Overheated chocolate can seize or become grainy.
- Adding marshmallows while the chocolate is too hot — follow the step to let the melted chocolate rest 1–2 minutes. If it’s hot, the marshmallows will melt and you’ll lose the classic Rocky Road texture.
- Not chilling long enough — the log needs time to firm up. If you cut it too soon the pieces will be soft and messy.
- Using large marshmallows — the recipe specifies miniatures because they distribute more evenly; large marshmallows create uneven bites and make shaping more difficult.
Seasonal Flavor Boosts
Small additions can make Rocky Road feel seasonal without adding complexity. A few thoughtful touches take this classic into holiday territory or customize it for different occasions.
- Holiday: Add a pinch of cinnamon or a few finely chopped candied orange peel pieces to the chocolate before folding in the marshmallows and nuts.
- Winter: Stir in a teaspoon of instant espresso powder to the melted chocolate for depth and warmth.
- Summer: Use toasted almonds and fold in a handful of dried cherries or cranberries for a brighter profile.
- Fall: Swap the nuts for toasted pecans and add a sprinkle of flaky sea salt on the chilled log before slicing.
Insider Tips
These are the small techniques I use to make every batch consistent and simple to execute.
- Warm the bowl slightly, not too hot: a one- to two-minute rest after melting is enough to avoid melting the marshmallows while keeping the chocolate fluid for coating.
- Toast the nuts briefly in a dry skillet until fragrant. Let them cool before chopping. This step is optional but elevates the flavor considerably.
- Shape the log using the waxed paper as a sling—spoon the mixture onto the center, fold the paper over, and roll gently to form a tidy cylinder. This keeps your hands cleaner and the log neater.
- If chocolate sticks to the knife, dip the blade in hot water and dry it before slicing. Wiping between cuts also keeps pieces looking clean.
Storage Pro Tips
Proper storage preserves the texture and flavor. Rocky Road Candy keeps well when handled correctly.
- Refrigerator: Store in an airtight container lined with waxed paper. Properly chilled, pieces will stay firm for up to two weeks, though the marshmallows may soften slightly over time.
- Freezer: For longer storage, double-wrap the log in waxed paper and place in a freezer bag. Freeze up to 3 months. Thaw in the refrigerator before slicing to prevent cracking the chocolate.
- Room temperature: In cool climates or during cooler months, you can store the candy at room temperature in an airtight container for a few days. Avoid warm kitchens; chocolate will soften and lose snap.
Rocky Road Candy Q&A
What nuts work best?
Pecans, walnuts, almonds, and peanuts are classic choices. Toast them lightly for the best flavor. If serving guests, check for nut allergies and consider omitting or offering a nut-free version.
Can I use milk or dark chocolate instead?
Yes. Semi-sweet is traditional and balances the marshmallow sweetness, but milk chocolate will yield a sweeter, creamier candy; dark chocolate will be more intense. Each choice changes the end flavor but the method stays the same.
Why are the marshmallows still chewy?
That’s intentional. The marshmallows are coated, not melted into the chocolate, so they retain a soft chew. If you prefer a more fused texture, heat the chocolate a bit more before folding—but be careful not to melt them completely.
How thin or thick should I shape the log?
Shape it to a diameter that’s easy to cut into 1/2-inch slices. Too thin and the pieces will be fragile; too thick and they’re harder to bite evenly. A modest cylinder about 1.5–2 inches in diameter works well.
Can I make bars instead of slices?
Yes. Press the mixture into a small lined pan and chill until firm, then cut into bars. Keep in mind thicker bars will need a longer chill time to set through.
Before You Go
Rocky Road Candy is a small, dependable recipe that gives big returns for a little effort. Keep the technique in mind—warm but not hot chocolate, gentle folding, and a solid chill—and you’ll consistently get attractive, tasty pieces. Try it once as written, then tweak nuts, chocolate type, or add-ins to make it your own.
If you give this a try, I’d love to hear what nut you used or any stubborn obstacle you ran into. It’s simple, but small changes matter—and I’m always happy to troubleshoot with you.

Rocky Road Candy
Ingredients
Ingredients
- 12 ouncessemi-sweet chocolate chips
- 4 cupsmarshmallows miniatures
- 1/3 cupschopped nuts
Instructions
Instructions
- Line a baking sheet or countertop with a sheet of waxed paper.
- Put 12 ounces semi-sweet chocolate chips in a heatproof bowl. Melt the chocolate either: (a) in a double boiler over simmering (not boiling) water, stirring until smooth, or (b) in the microwave at 50% power in 20–30 second intervals, stirring between intervals, until smooth.
- Let the melted chocolate sit 1–2 minutes so it is warm but not hot (this helps prevent the marshmallows from melting).
- Add 4 cups miniature marshmallows and 1/3 cup chopped nuts to the melted chocolate. Fold gently with a spatula until the marshmallows and nuts are evenly coated.
- Spoon the mixture onto the prepared waxed paper. Use the paper and a spatula or your hands to shape the mixture into a log.
- Wrap the log completely in the waxed paper (twist the ends or cover snugly) and place it in the refrigerator. Chill until firm, about 2 hours.
- Unwrap the chilled log and place it on a cutting board. Slice into 1/2-inch pieces with a sharp knife (wipe the knife between cuts if the chocolate sticks).
Equipment
- Heatproof bowl
- double boiler
- Microwave
- Spatula
- waxed paper
- Baking Sheet
- Refrigerator
- Cutting Board
- Sharp Knife