I want the food I cook to feel approachable and honest. This rosemary chicken is exactly that: a few bright, simple ingredients, a short hands-on time, and an oven doing the heavy lifting. It’s the kind of dish you can pull together on a weeknight and still feel proud of when you sit down to eat.
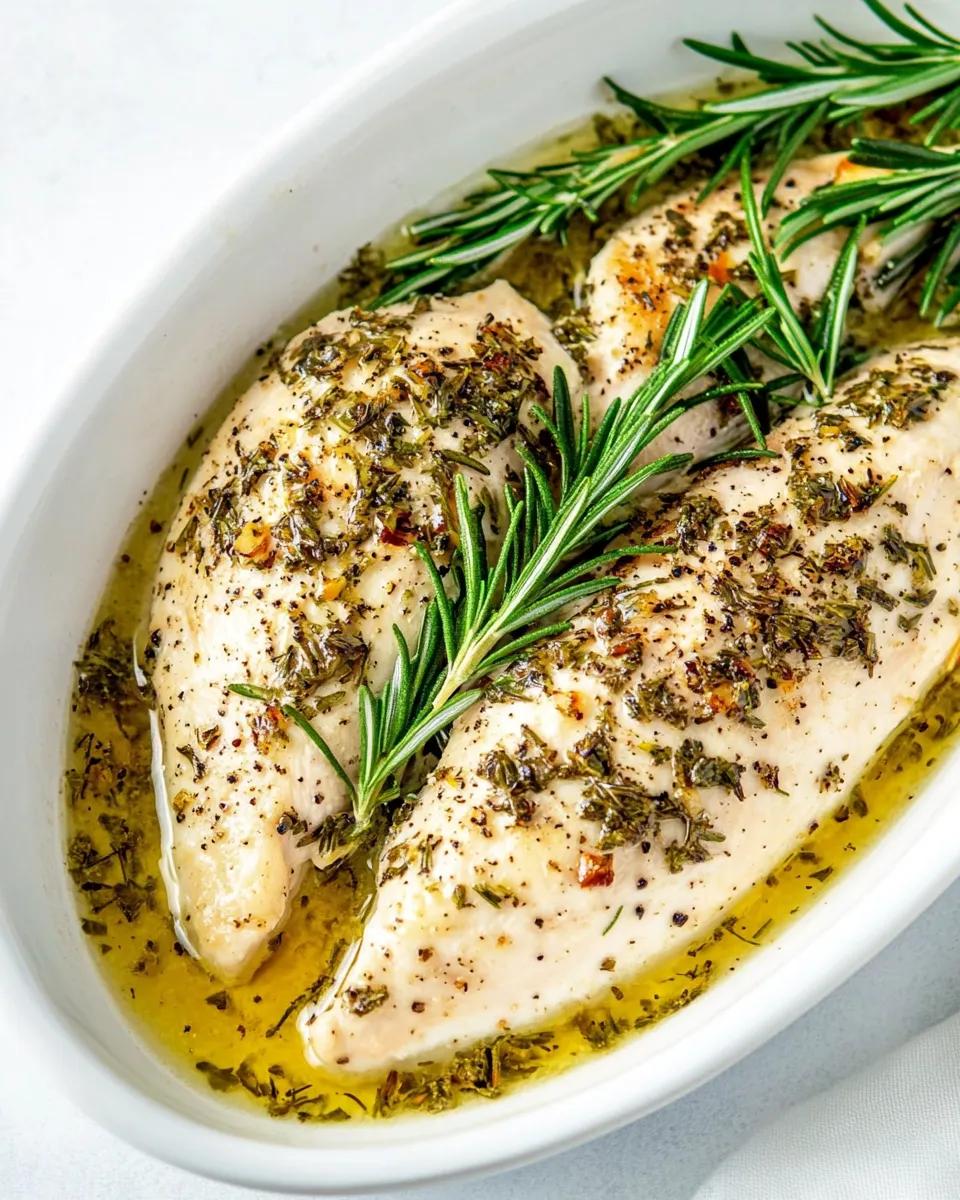
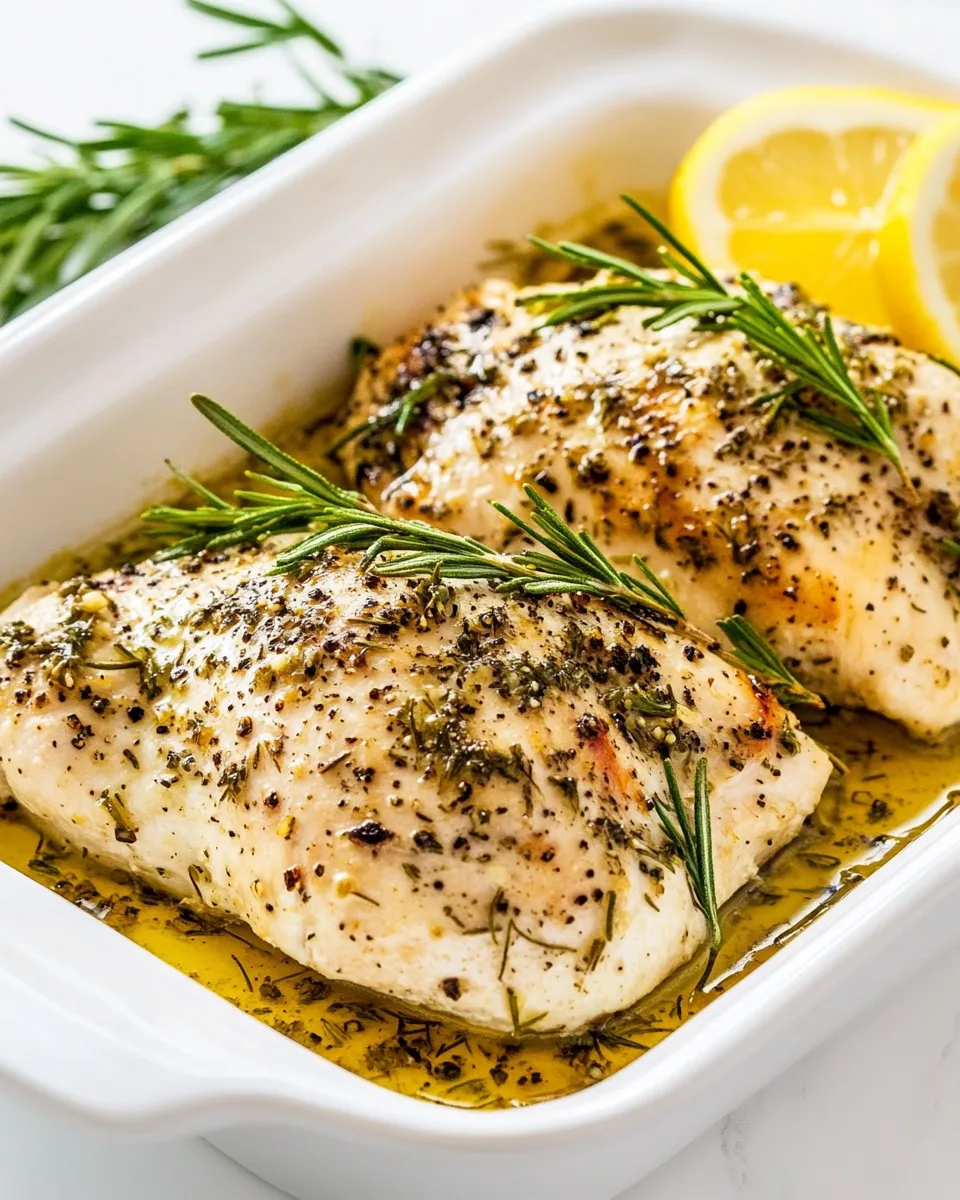
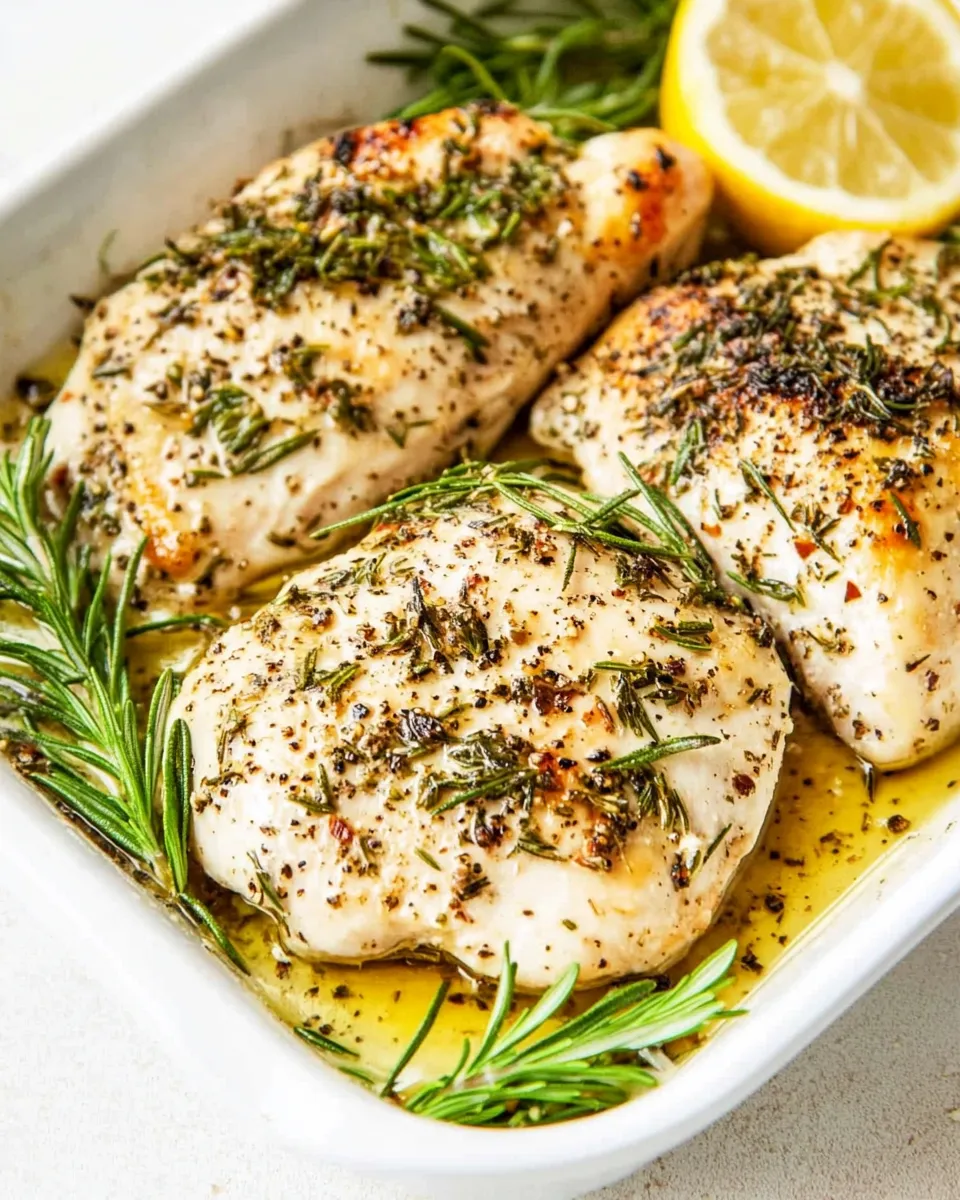
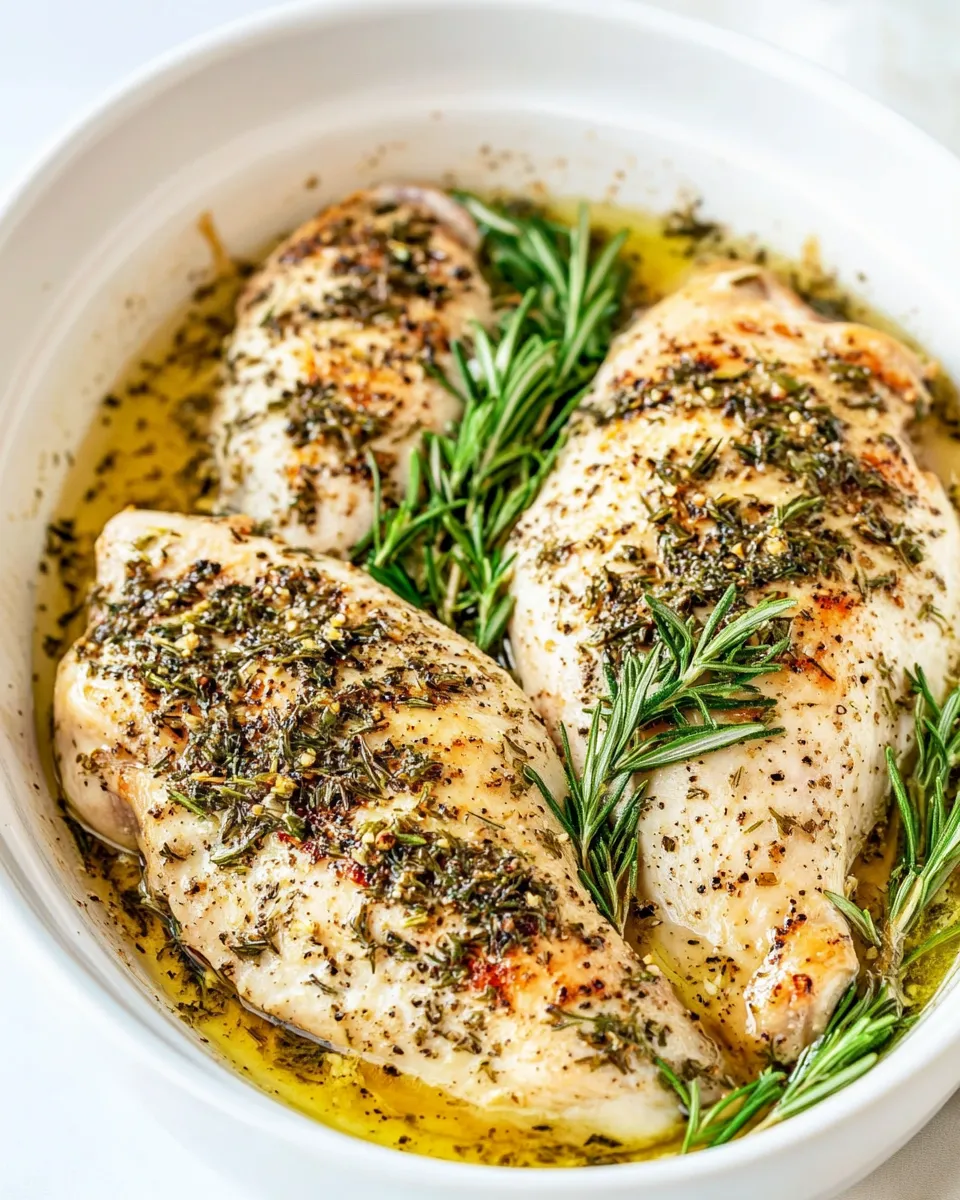
There’s a directness to lemon and rosemary together that never feels fussy. The lemon sharpens, the rosemary perfumes, and a little olive oil ties it all to the chicken. The technique is straightforward, but the result is juicy, fragrant breasts with a crisped edge and clean, Mediterranean flavors.
Below I’ll walk you through the ingredients, the exact steps I follow, practical equipment notes, common mistakes to avoid, and storage tips so the next night’s leftovers taste just as good. No fluff—just what you need to make the most of this recipe every time.
What’s in the Bowl
This recipe keeps the flavor profile very simple: chicken, olive oil, lemon, fresh rosemary, garlic, salt, and pepper. The bowl is where the marinade comes together—olive oil softens the lemon and rosemary, garlic adds depth, and a quick spooning over the breasts ensures every bite is seasoned.
Because the ingredients are minimal, quality matters. Use fresh rosemary and a good extra-virgin olive oil if you can; they make a noticeable difference without any extra work.
Ingredients
- 4 boneless skinless chicken breasts — the main protein; pat dry for better browning and even cooking.
- 2 tablespoons olive oil — carries flavor and helps the chicken brown; extra-virgin is fine but a neutral oil works too.
- 1 lemon juiced — adds brightness and a touch of acid to balance the oil and herbs.
- 2 tablespoons fresh rosemary minced — provides the signature piney, aromatic note; mince finely so it distributes evenly.
- 2 cloves garlic minced — brings savory depth; mince or press for maximum flavor release.
- Salt to taste — seasons the chicken; sprinkle both sides before adding the marinade.
- Black pepper to taste — adds gentle heat and contrast; freshly cracked is best.
Rosemary Chicken: From Prep to Plate
- Preheat the oven to 400°F and position a rack in the center of the oven.
- Pat the 4 boneless skinless chicken breasts dry with paper towels and set them in a single layer in a baking dish.
- In a small bowl, combine 2 tablespoons olive oil, the juice of 1 lemon, 2 tablespoons minced fresh rosemary, and 2 minced garlic cloves; stir until evenly mixed.
- Season both sides of the chicken breasts with salt and black pepper to taste.
- Pour the rosemary-lemon mixture evenly over the chicken, turning each breast once or spooning the mixture over both sides so they are well coated.
- Bake in the preheated oven for 25 minutes, or until the thickest part of the chicken reaches an internal temperature of 165°F.
- Remove the baking dish from the oven and let the chicken rest for 5 to 10 minutes before slicing and serving.
Why You’ll Keep Making It
This recipe is reliable. With just a handful of ingredients and a fixed bake time, you get consistent results: juicy meat and a clear, bright rosemary-lemon flavor. It’s forgiving—there’s little to go wrong if you follow the basic steps—so it’s perfect for cooks who want something quick without trading flavor.
It’s also adaptable. The flavors pair well with so many sides: roasted vegetables, a simple salad, rice, or mashed potatoes. That flexibility makes it a go-to for nights when you want a wholesome meal without the mental load of a complicated recipe.
Finally, leftovers reheat well. Sliced on top of a grain bowl, tucked into a sandwich, or added to a salad, the chicken maintains its character and keeps dinner interesting the next day.
International Equivalents
Many cuisines have a version of lemon-and-herb roasted chicken. In Mediterranean cooking, you’ll find similar combinations where citrus and herbs brighten simple roasted poultry; in French home kitchens, poulet rôti often leans on herbs de Provence instead of rosemary but achieves the same comforting effect.
In Italian cooking, a simple grilled or roasted chicken with rosemary, garlic, and lemon mirrors this recipe’s flavor profile, though olive oil and the finishing touches vary by region. Think of this as a familiar Mediterranean approach: humble, herb-forward, and citrus-bright.
Equipment at a Glance
- Oven — key for even, hands-off cooking at 400°F.
- Baking dish — large enough to hold the breasts in a single layer so they cook evenly.
- Small mixing bowl — to whisk olive oil, lemon, rosemary, and garlic together.
- Paper towels — for patting the chicken dry; this promotes browning.
- Instant-read thermometer — optional but the best way to confirm the thickest part reaches 165°F.
- Spoon or small spatula — to turn or baste the chicken with the marinade.
Avoid These Mistakes
Skipping the pat-dry step: excess surface moisture prevents the chicken from browning. Drying the breasts helps the olive oil and lemon adhere and gives you a better texture.
Overcrowding the dish: if the breasts touch, they’ll steam rather than roast. Give each piece a bit of space so hot air can circulate.
Not checking temperature: relying on time alone can be misleading if chicken breasts vary in thickness. An instant-read thermometer removes doubt—look for 165°F at the thickest point.
Letting the chicken rest too briefly: slicing immediately after it comes out of the oven pushes flavorful juices onto the cutting board. A 5–10 minute rest lets juices redistribute and keeps slices moist.
Dietary Swaps & Alternatives
Gluten-free: This recipe is naturally gluten-free as written. No swaps needed.
Dairy-free: The recipe contains no dairy. Keep everything the same.
Lower-sodium option: Use less salt when seasoning and finish with a squeeze of fresh lemon at the table to build brightness without relying on sodium.
Herb variations: If you don’t have rosemary, try equal parts chopped thyme or oregano—those herbs work well with lemon and garlic. Use fresh if possible; dried herbs are more concentrated, so use sparingly (though the recipe calls specifically for fresh rosemary).
Oil alternatives: If you need to avoid olive oil, a neutral oil like avocado or grapeseed will do the job; they won’t change the core flavor much.
Method to the Madness
There’s a simple logic to the steps: drying, seasoning, coating, cooking, and resting. Drying creates surface tension for browning. Seasoning both sides ensures flavor throughout, while the olive oil acts as both a flavor carrier and a protective layer that helps the lemon and herbs cling to the meat.
Baking at 400°F is a balance point: hot enough to cook the chicken through in about 25 minutes without drying it out. The internal temperature target of 165°F is the safe end point; pulling earlier risks undercooking, and overcooking leaves the meat dry.
Timing and thickness
If breasts are unusually thick, loosen the bake time slightly and rely on an instant-read thermometer for accuracy. If they’re thin, check a few minutes early. The resting period is not optional—plan for it so juices settle and you don’t lose moisture when slicing.
Keep It Fresh: Storage Guide
Cool leftovers within two hours and store in an airtight container in the refrigerator for up to 3–4 days. Slice before storing if you plan to use it on salads or in sandwiches for quick access.
To reheat, use a skillet over medium-low heat with a splash of water or broth and cover briefly to steam through without drying. Alternatively, reheat in a 300°F oven until warmed through—this is gentler than microwaving and helps keep the texture intact.
For longer storage, freeze cooked breasts tightly wrapped or in a freezer-safe container for up to 2 months. Thaw overnight in the fridge before reheating gently.
Quick Q&A
Q: Can I use bone-in chicken? A: Yes. Bone-in pieces will take longer—plan for additional bake time and confirm with a thermometer. The flavors remain the same, but cooking time increases.
Q: Can I marinate the chicken longer? A: You can let the mixture sit on the chicken for up to a few hours in the fridge. Because lemon is acidic, I avoid marinating overnight to prevent the meat from becoming too firm or “cooked” by the acid.
Q: Can I grill this instead of baking? A: Absolutely. Grill over medium heat and watch closely; cook until the same internal temperature is reached. Brush with the rosemary-lemon mixture while cooking to build flavor.
Q: Should I remove rosemary before serving? A: No need. Finely minced rosemary integrates into the oil and adds fragrance. If you used whole sprigs, remove them before serving to avoid overly woody bites.
Ready to Cook?
Gather those few, fresh ingredients and preheat your oven. This rosemary chicken is built to be reliable: straightforward prep, consistent results, and plenty of ways to serve or adapt it. Follow the steps, check the temperature, let it rest, and you’ll have a weeknight dinner that tastes like you took your time.
If you try it, tell me how you served it—roasted veg, a green salad, or a lemony grain bowl? Small swaps and side choices are part of what makes this dish a staple in my kitchen, and I’d love to hear yours.

Rosemary Chicken
Ingredients
Ingredients
- 4 bonelessskinless chicken breasts
- 2 tablespoonsolive oil
- 1 lemonjuiced
- 2 tablespoonsfresh rosemaryminced
- 2 clovesgarlicminced
- Salt to taste
- Black pepper to taste
Instructions
Instructions
- Preheat the oven to 400°F and position a rack in the center of the oven.
- Pat the 4 boneless skinless chicken breasts dry with paper towels and set them in a single layer in a baking dish.
- In a small bowl, combine 2 tablespoons olive oil, the juice of 1 lemon, 2 tablespoons minced fresh rosemary, and 2 minced garlic cloves; stir until evenly mixed.
- Season both sides of the chicken breasts with salt and black pepper to taste.
- Pour the rosemary-lemon mixture evenly over the chicken, turning each breast once or spooning the mixture over both sides so they are well coated.
- Bake in the preheated oven for 25 minutes, or until the thickest part of the chicken reaches an internal temperature of 165°F.
- Remove the baking dish from the oven and let the chicken rest for 5 to 10 minutes before slicing and serving.
Equipment
- Oven
- Baking Dish
- Small Bowl