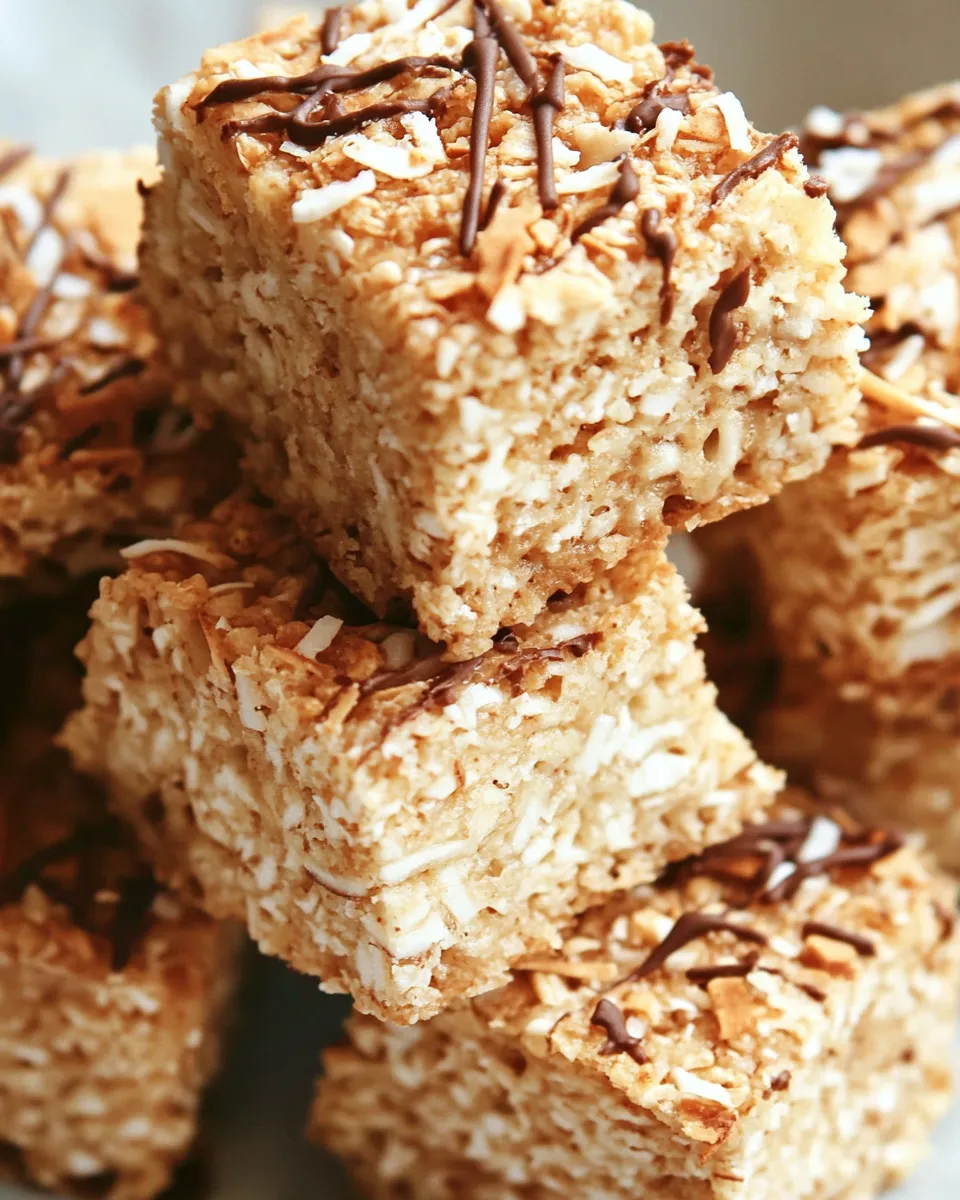
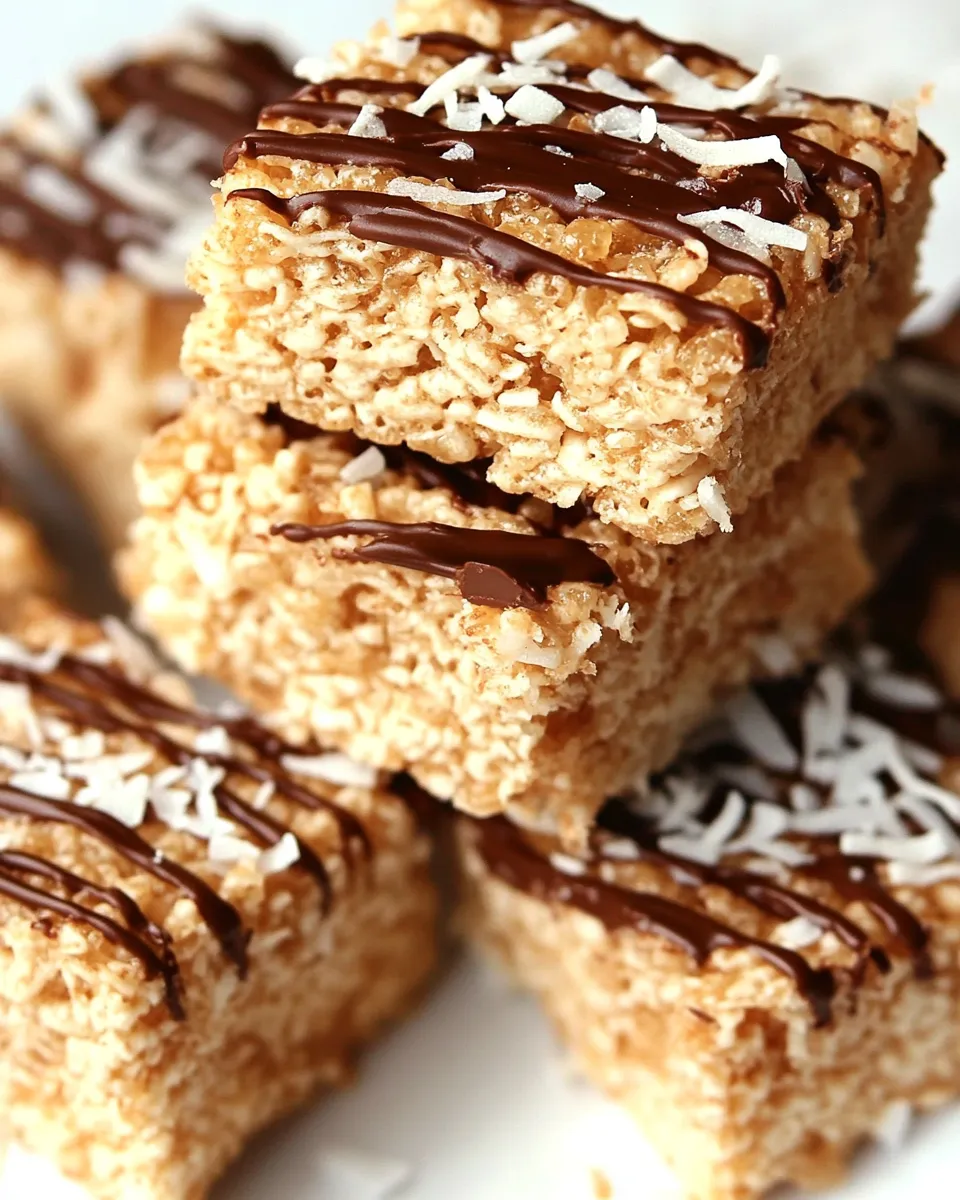
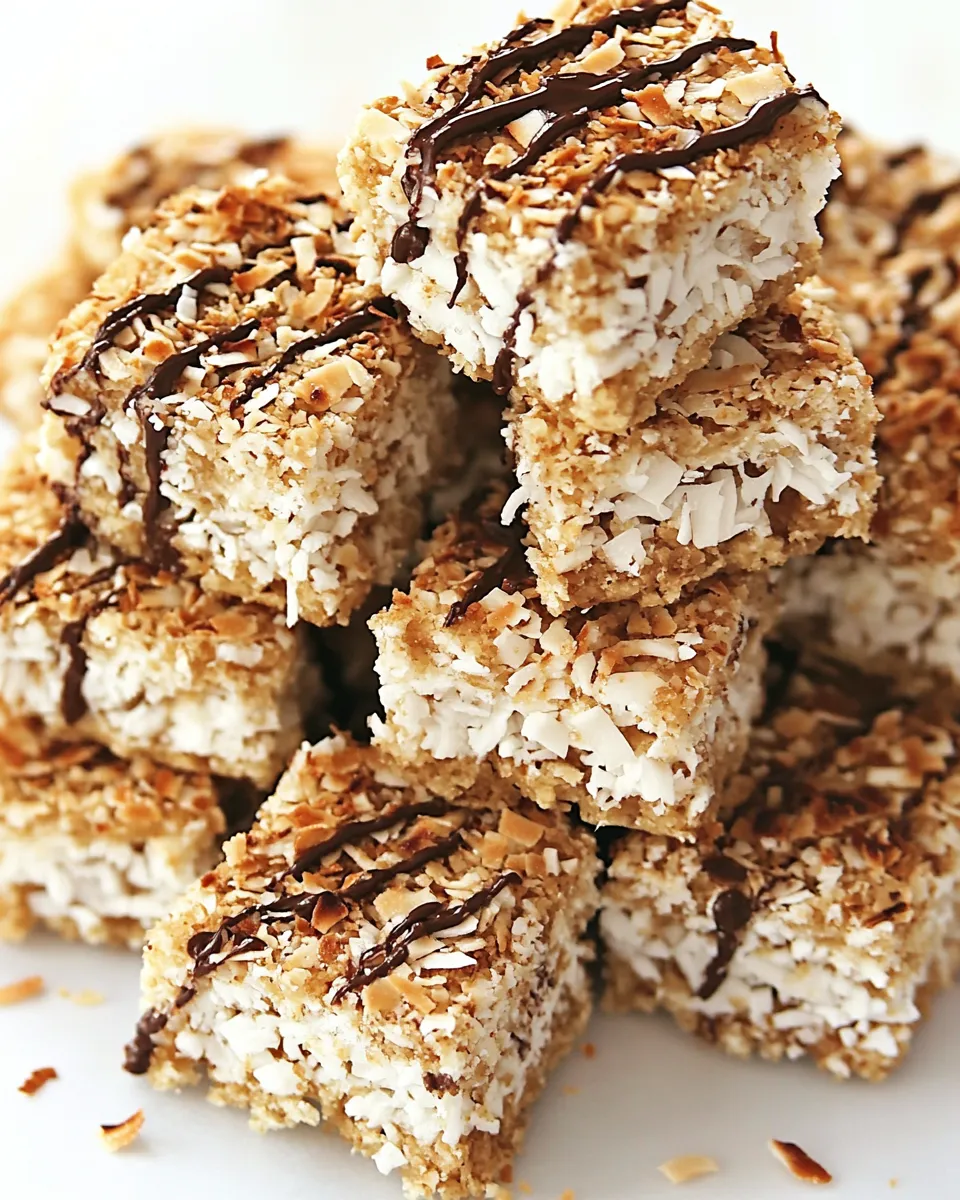
These are the kind of treats that disappear faster than you can wash the mixing bowl. They take the familiar, nostalgic comfort of Rice Krispies treats and nudge them into something a little more grown-up: browned butter for depth, toasted coconut for crunch and aroma, and a drizzle of Nutella to finish. They still come together quickly, but the payoff is worth the extra two steps.
I keep the process straightforward because these are meant to be made often — for bake sales, last-minute guests, or just because you want something chewy and buttery within the hour. Timing matters more than technique: toast the coconut, brown the butter, melt the marshmallows carefully, and move quickly when you add the cereal.
What We’re Using
Ingredient-wise this recipe stays loyal to classic krispy treats: butter, marshmallows, cereal, and a bit of coconut plus a chocolatey drizzle. The only real twist is browning the butter for a nutty, caramel-like aroma and toasting the shredded coconut separately so it contributes texture and flavor rather than sogginess. The instructions are deliberate to avoid burning the coconut or butter — that’s where most takes go wrong.
Tools are minimal: a skillet for toasting, a saucepan for browning and melting, and an 8×8 pan to set the slab. No fancy equipment. Pace yourself during the warm stages and press firmly into the pan for clean squares.
Ingredients
- 1 stick + 2 tablespoons salted butter — for browning; provides the nutty, rich base that elevates the whole treat.
- 1 10-ounce bag marshmallows — the binder; melts into the butter to coat cereal and coconut.
- (1) 7 ounce bag sweetened shredded coconut, toasted — toasted first to bring out flavor and add crunch.
- 6 cups Rice Krispies cereal — the classic structure; gives chew and lightness.
- 1/4 cup Nutella, for drizzling — warmed and drizzled on top for a glossy, hazelnut finish.
Step-by-Step: Brown Butter And Toasted Coconut Krispy Treats
- Toast the coconut: place the entire 7-ounce bag of shredded coconut in a dry skillet over medium‑high heat. Stir constantly until the coconut is lightly golden and fragrant (watch closely — it burns quickly). Immediately transfer the coconut to a plate to cool completely.
- Prepare the pan: coat an 8×8-inch square pan with nonstick spray. Line the pan with parchment paper leaving an overhang for easy removal, then spray the parchment lightly. Set the pan aside.
- Brown the butter: in a large saucepan over medium‑low heat, melt 1 stick + 2 tablespoons salted butter. Stir almost constantly as it melts, foams, and then the milk solids begin to turn golden and smell nutty. Scrape up any browned bits from the bottom as you stir. As soon as the butter reaches a golden‑brown color, remove the pan from the heat.
- Melt the marshmallows: add the entire 10-ounce bag of marshmallows to the browned butter. Stir constantly until the marshmallows are fully melted and the mixture is smooth. If needed, return the pan to very low heat for a few seconds while stirring, but avoid overheating or burning.
- Add cereal and coconut: remove the pan from heat and immediately pour in 6 cups Rice Krispies cereal and the cooled toasted coconut. Stir quickly and thoroughly until the cereal and coconut are evenly coated with the marshmallow mixture.
- Transfer to the pan: quickly scrape the mixture into the prepared 8×8 pan. Using a buttered spatula or lightly buttered hands, press the mixture firmly and evenly into the pan, pushing into the edges and corners.
- Cool and remove: let the pan sit at room temperature until the treats are set and cool to the touch. Use the parchment overhang to lift the slab from the pan.
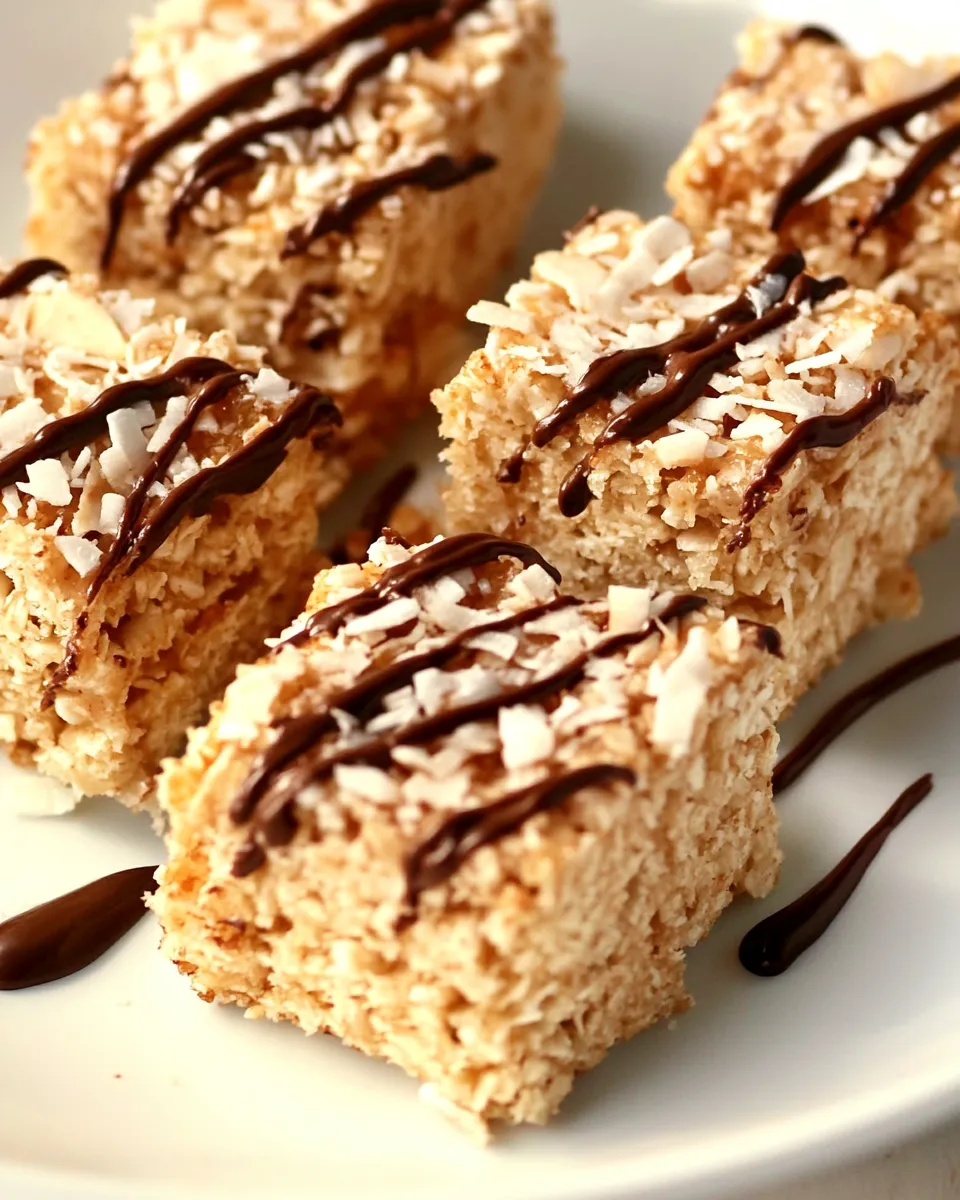
- Cut into squares: transfer the slab to a cutting board and cut into squares of your desired size.
- Drizzle with Nutella: place 1/4 cup Nutella in a small microwave‑safe bowl and warm in short intervals (about 10–15 seconds), stirring between intervals, just until it becomes pourable. Transfer the warmed Nutella to a small zip‑top bag and snip a tiny corner, or use a spoon, then drizzle the Nutella over each square.
What Sets This Recipe Apart
It’s the three small decisions that change everything: browning the butter, toasting the coconut separately, and finishing with a Nutella drizzle. Browning the butter adds complexity without extra ingredients. Toasting the coconut prevents sogginess and brings a toasted, almost caramelized character. The Nutella is optional, but it melts into the marshmallow-coated top and creates a visual and flavor contrast that makes each square feel more indulgent.
Texture-wise, you still get the soft chew of a classic krispy treat, but the toasted coconut adds intermittent crunch and the browned butter adds subtle caramel notes that make the memory of each bite linger.
Substitutions by Category
- Butter — If you prefer unsalted butter, use it and add a pinch of salt when browning to compensate. European-style butter will yield a slightly richer flavor.
- Marshmallows — Standard marshmallows are best. For a vegan option, use vegan marshmallows (see Tailor It to Your Diet), but expect a slight change in texture.
- Coconut — If you can’t find shredded sweetened coconut, use unsweetened shredded coconut and sprinkle 1–2 teaspoons of sugar into the toasted coconut to mimic sweetness.
- Cereal — Rice Krispies are recommended for their snap and lightness. Other puffed rice cereals can work but may change chewiness and density.
- Chocolate drizzle — Swap Nutella for melted chocolate spread, ganache, or a simple melted chocolate bar. Keep the drizzle quantity minimal to avoid weighing the treats down.
What You’ll Need (Gear)
- Dry skillet — for toasting the coconut (cast iron or stainless steel works well).
- Large saucepan — for browning butter and melting marshmallows.
- 8×8-inch square pan — for setting the treats.
- Parchment paper and nonstick spray — for easy removal and clean edges.
- Spatula and heatproof spoon — for stirring and pressing into the pan.
- Small microwave-safe bowl or double boiler — to warm Nutella for drizzling.
What Not to Do
- Do not walk away while toasting the coconut — it goes from golden to burnt in seconds. Stir constantly and reduce heat if needed.
- Do not skip scraping the browned bits when you brown the butter — they carry the nutty flavor. But remove from heat as soon as the milk solids are golden to avoid bitterness.
- Do not overheat the marshmallow mixture — marshmallows can scorch quickly; stir constantly and use the lowest practical heat.
- Do not press the mixture too lightly into the pan — loosely packed treats fall apart. Press firmly but avoid squeezing out air pockets that make the slab too dense.
- Do not drizzle hot Nutella directly over the slab while it’s piping hot — the marshmallow surface can become sticky and smear. Wait until the slab is cool to the touch.
Tailor It to Your Diet
Want to make these for specific diets? Here are practical options and what to expect:
- Vegan — Use vegan butter and vegan marshmallows. Swap Nutella (contains skim milk) for a vegan chocolate-hazelnut spread or melted dairy-free chocolate. Texture will be slightly different; press a touch firmer to help them hold.
- Lower-sugar — There’s limited room to reduce sugar without changing texture because marshmallows provide structure. You can reduce the drizzle to lower sugar on top, or use a lower-sugar chocolate spread, but the base will still be sweet.
- Nut-free — Skip the Nutella and use melted chocolate instead. Ensure any chocolate spread or chocolate is processed in a nut-free facility if serving someone with an allergy.
Insider Tips
- Toast the coconut first and let it cool completely before adding. Warm coconut will steam inside the mixture and create soggy pockets.
- When browning the butter, watch for a nutty aroma and small brown specks. If you smell bitterness, you’ve gone too far.
- Work quickly when mixing in the cereal and coconut. The marshmallow mixture sets fast; have your pan ready and your spatula or buttered hands prepared.
- To press the mixture evenly, use a piece of parchment or a piece of plastic wrap lightly buttered. Press with flat palms to avoid compacting too much.
- Warm Nutella in 10–15 second increments, stirring between each. Overheating will make it runny and thin; you want a controlled drizzle.
- For neater squares, chill the slab for 10–15 minutes before cutting. Use a sharp knife wiped clean between cuts for straight edges.
Prep Ahead & Store
These hold well at room temperature for up to 2 days in an airtight container. Layer squares with parchment between them to prevent sticking. For longer storage, freeze the slab whole (wrapped tightly) for up to 1 month; thaw at room temperature and slice after it softens slightly. If you drizzle with Nutella, consider storing the drizzle separately and adding it after thawing if you expect condensation.
Quick Questions
- Can I skip toasting the coconut? You can, but the coconut will taste milder and may be softer in texture. Toasting brings a deeper flavor and keeps the texture lively.
- Why brown the butter instead of using melted butter? Browning develops nutty, caramel-like compounds that add complexity. Melted butter lacks that depth.
- Can I make these in a larger pan? Yes. If you use a 9×13, expect a thinner treat and slightly shorter set time. Adjust pressing to avoid overly thin bars.
- What if my marshmallows seize or burn? Lower the heat immediately and stir. If they burn, start over — burnt flavor carries through and is unpleasant.
The Takeaway
Brown Butter And Toasted Coconut Krispy Treats are an easy upgrade to a childhood classic. A couple of extra minutes — toasting the coconut and browning the butter — yield far more flavor with minimal fuss. Follow the order of steps, move deliberately during the marshmallow stage, and press the mixture firmly for tidy squares. They’re approachable, fast, and reliably impressive.
Make a batch this weekend. Toast the coconut carefully, brown that butter, and enjoy a slightly more adult version of a beloved sweet.
Brown Butter And Toasted Coconut Krispy Treats
Ingredients
Ingredients
- 1 stick +2 tablespoons salted butter
- 1 10- ouncebag marshmallows
- 1 7 ounce bag sweetened shredded coconut, toasted
- 6 cupsRice Krispies cereal
- 1/4 cupnutella for drizzling
Instructions
Instructions
- Toast the coconut: place the entire 7-ounce bag of shredded coconut in a dry skillet over medium‑high heat. Stir constantly until the coconut is lightly golden and fragrant (watch closely — it burns quickly). Immediately transfer the coconut to a plate to cool completely.
- Prepare the pan: coat an 8x8-inch square pan with nonstick spray. Line the pan with parchment paper leaving an overhang for easy removal, then spray the parchment lightly. Set the pan aside.
- Brown the butter: in a large saucepan over medium‑low heat, melt 1 stick + 2 tablespoons salted butter. Stir almost constantly as it melts, foams, and then the milk solids begin to turn golden and smell nutty. Scrape up any browned bits from the bottom as you stir. As soon as the butter reaches a golden‑brown color, remove the pan from the heat.
- Melt the marshmallows: add the entire 10-ounce bag of marshmallows to the browned butter. Stir constantly until the marshmallows are fully melted and the mixture is smooth. If needed, return the pan to very low heat for a few seconds while stirring, but avoid overheating or burning.
- Add cereal and coconut: remove the pan from heat and immediately pour in 6 cups Rice Krispies cereal and the cooled toasted coconut. Stir quickly and thoroughly until the cereal and coconut are evenly coated with the marshmallow mixture.
- Transfer to the pan: quickly scrape the mixture into the prepared 8x8 pan. Using a buttered spatula or lightly buttered hands, press the mixture firmly and evenly into the pan, pushing into the edges and corners.
- Cool and remove: let the pan sit at room temperature until the treats are set and cool to the touch. Use the parchment overhang to lift the slab from the pan.
- Cut into squares: transfer the slab to a cutting board and cut into squares of your desired size.
- Drizzle with Nutella: place 1/4 cup Nutella in a small microwave‑safe bowl and warm in short intervals (about 10–15 seconds), stirring between intervals, just until it becomes pourable. Transfer the warmed Nutella to a small zip‑top bag and snip a tiny corner, or use a spoon, then drizzle the Nutella over each square.
Equipment
- Dry Skillet
- Large Saucepan
- 8x8-inch square pan
- Parchment Paper
- Spatula
- Microwave-safe Bowl
- small zip-top bag